
Light Up Your Autumn Nights with Natural Aromas
As darkness falls a little earlier on this crisp autumn evening, there’s a collective desire to draw inward, to create pockets of warmth and light in our homes. And what better way to do that than with the soft, flickering glow of a candle?
But this year, let’s go beyond the store-bought variety. Imagine lighting a candle you crafted yourself, one that releases a custom, all-natural scent—the crispness of a winter forest, the invigorating tingle of peppermint, and the subtle warmth of holiday spices.
This DIY project for Herbal & Spice-Infused Soy Candles is a beautiful way to welcome the cozier seasons. It’s a wonderfully grounding activity that results in a rustic, aromatic candle perfect for your own home or for giving as a heartfelt, handmade gift.
What You’ll Need (The Candle-Making Essentials):
- Soy Wax Flakes: A natural, clean-burning wax that’s perfect for beginners. (You’ll need enough to fill your chosen jar twice over, as a general rule).
- Heat-Safe Glass Jars or Tins: Mason jars, old candle containers, or tins work beautifully.
- Candle Wicks with Metal Bases
- A Pouring Pot or a Double Boiler: You can create a double boiler by placing a heat-safe bowl or smaller pot over a larger saucepan filled with a few inches of water.
- Wick Centering Tool or Clothespins/Popsicle Sticks: To hold the wick in place while the wax sets.
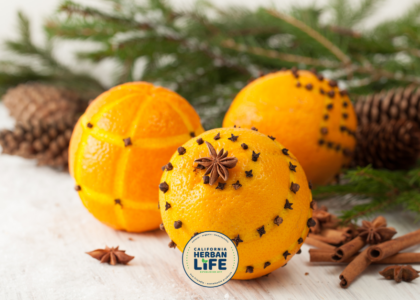
- Dried Herbs & Spices: For this recipe, you’ll need 1/4 teaspoon of ground cinnamon and a few crushed cloves.
- Your Essential Oils (details below!)
The “Crisp Winter Air” Essential Oil Blend:
This blend is designed to smell like a brisk walk through a snowy forest—clean, invigorating, and deeply refreshing.
- 10 drops Balsam Fir essential oil: The classic, fresh scent of a Christmas tree, instantly uplifting.
- 10 drops Peppermint essential oil: A cool, invigorating note that adds a touch of brightness and clarity.
- 5 drops Cypress essential oil: A clean, grounding, and slightly woody aroma that rounds out the forest scent.
Total Essential Oils: 25 drops (For an 8 oz candle. Adjust between 20-30 drops based on your preference.)
Instructions: Crafting Your Infused Candle
- Set Up Your Workstation: Protect your surfaces with newspaper or a craft mat. Make sure your glass jar is clean and completely dry.
- Secure the Wick: Dip the metal base of your wick into a tiny bit of melted wax (or use a wick sticker) and press it firmly to the center of the bottom of your jar. Use clothespins or a centering tool laid across the jar’s opening to hold the wick straight and centered.
- Melt the Wax: Using your double boiler, melt the soy wax flakes over medium-low heat. Stir occasionally until the wax is completely melted and clear. Avoid overheating; you don’t want it to boil.
- Cool Slightly & Add Fragrance: Remove the melted wax from the heat and let it cool for a couple of minutes. This is crucial! If the wax is too hot, it can burn off the delicate essential oils. A good rule of thumb is to wait until it’s around 180-185°F.
- Infuse with Herbs & Oils: Gently stir in your ground cinnamon, crushed cloves, and the 20-30 drops of your “Crisp Winter Air” essential oil blend. Mix thoroughly but gently for about 30 seconds to ensure everything is evenly distributed.
- Pour the Wax: Carefully and slowly pour the infused wax into your prepared jar, making sure the wick stays centered.
- Let it Cool & Cure: Let the candle cool completely at room temperature on a flat surface. This can take several hours or even overnight. Avoid placing it in the fridge or freezer, as this can cause cracking. For the best scent throw, let your candle “cure” for at least 3-4 days before lighting.
Important Candle Making & Safety Tips:
- Fire Safety First: Never leave a burning candle unattended. Keep it away from flammable objects, children, and pets.
- Herb Placement: The ground spices will mix into the wax. Be aware that any herbs placed too close to the wick could potentially singe. Using ground, fine spices is generally safer than large, loose botanicals.
- Trim Your Wick: Before each burn, trim the wick to about 1/4 inch. This prevents smoking and ensures a cleaner, more even burn.
- First Burn is Key: Allow the candle to burn long enough for the melted wax pool to reach the edges of the jar on the first burn. This prevents “tunneling” and helps your candle last longer.
There is a unique satisfaction in lighting a candle you’ve made with your own hands. Enjoy the process, the beautiful aroma, and the warm, flickering light that will surely make your autumn evenings feel even more special.